How Long Does It Take A Professional To Sand A Floor In Melbourne?

How Long Does It Take A Professional To Sand A Floor In Melbourne?

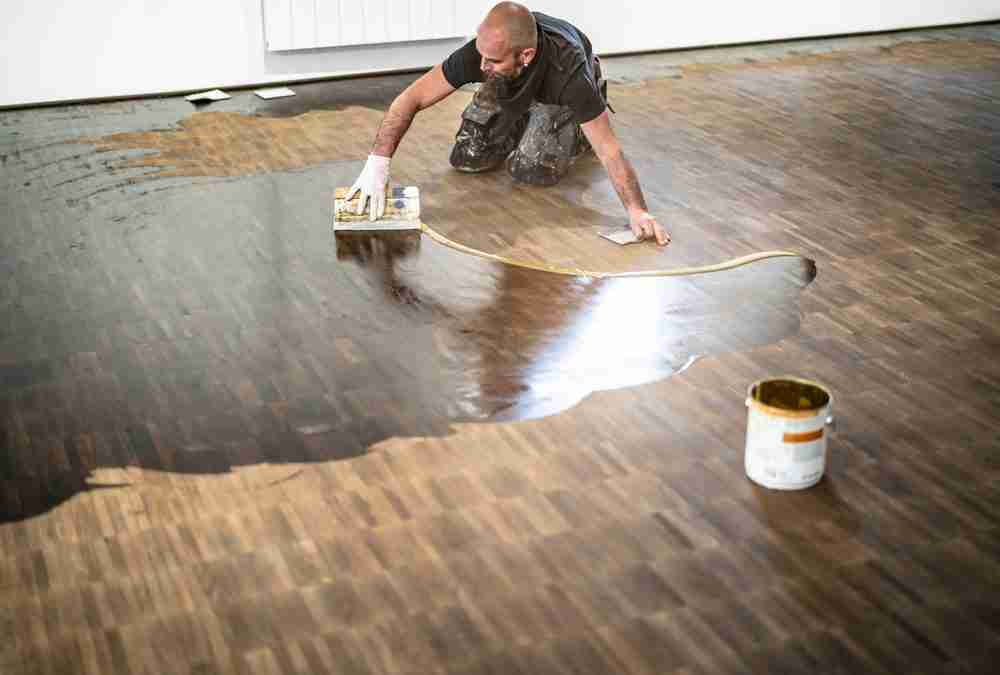
a floor sanding and polishing process

Floor sanding serves as a fundamental component of the renovation and restoration process, offering a transformative touch. This meticulous method involves removing old finishes, scratches, and imperfections from wooden floors, revealing their natural beauty, and restoring them to their former glory.

The typical flooring professional can sand approximately 1000 square feet per day. The duration for a professional to sand a floor varies depending on the size of the space and the floor’s design. Therefore, larger areas may require additional days to complete. If your home consists of four to six rooms in need of refinishing, the process can become lengthy. For areas exceeding 1000 square feet, anticipate that sanding may take longer than three days to complete. Some suggest that an average-sized room can be sanded in one day, followed by another day for hand finishing and applying varnish, wax, or oil. Alternatively, some professionals allocate a day per room, but they may complete the work ahead of schedule.

Factors Affecting Sanding Duration

Surface Area

The floor surface area is directly related to the time required for sanding. Larger areas include more coverage that is extensive and thus require additional time for thorough sanding. Additionally, rooms with complex spaces or numerous obstacles can make the process even longer as they demand careful attention to detail.

Wood Type

Individual wood species exhibit different density, grain, and hardness levels, which affect sanding duration. Hardwoods such as oak may require more passes with the sander to achieve the desired smoothness, while softer woods such as pine may require additional sanding and gentle treatment to prevent damage.

Condition of the Floor

The current condition of the floor profoundly affects the duration of the sand. Surfaces with existing finish, stains, or damage may require additional preparation and possibly multiple sanding stages to achieve optimal results. Additionally, floors in poor condition may require repairs before sanding, further extending the overall timeframe.

Equipment and Technology

Modern sanding equipment has revolutionized the efficiency of the sanding process. Advanced equipment, such as high-capacity sanders with dust extraction systems, reduces dust accumulation and increases productivity. Additionally, innovative sanding technologies allow more precise control over sanding depth and consistency, reducing the time required to achieve desired results.

Steps Involved in Floor Sanding

Preparation

Preparation is paramount to ensuring a successful floor-sanding project. This phase includes several key steps, including clearing furniture areas and barriers to provide uninterrupted access to the floor surface. Additionally, the floor is thoroughly cleaned and inspected to identify any damage, such as scratches, gouges, or uneven areas. Subsequent repairs are made to address these issues, ensuring a smooth and even sanding process.

Sanding Process

The sanding process is carried out carefully in multiple stages to achieve the best results. Initially, rough sanding removes existing finishes, blemishes, and surface imperfections, leveling the floor and preparing it for further refinishing. Subsequently, medium sanding is done to smooth the surface and remove any remaining scratches or irregularities. Finally, fine sanding is done to achieve a flawless, uniform finish that enhances the wood’s natural beauty.

Dust Removal

Effective dust removal is integral to maintaining a clean and safe work environment during floor sanding. Dust extraction systems are used to minimize airborne dust particles generated during the sanding process, protecting the health of both workers and occupants. Additionally, thorough cleaning procedures are applied after sanding to remove any remaining dust and debris, ensuring a pristine finish and prolonging the longevity of the floor.

Time Estimates for Different Floor Sizes

Small Rooms

Sanding smaller rooms or spaces usually requires a relatively short period, about 1 to 3 days, depending on factors such as the complexity of the layout, the condition of the floor, and the type of wood. These compact areas can often be efficiently sanded with minimal disruption, allowing for faster project completion.

Medium-Sized Rooms

The average time required to sand a medium-sized room or area falls between 2 and 5 days. These spaces encompass a moderate surface area, requiring thorough sanding to achieve the desired results. Factors such as the complexity of the floor design and the amount of repairs or refinishing required can slightly increase the duration of the sanding process.

Large Spaces

Sanding larger floors or open-plan areas involves an extended period because wider surface areas are involved. Depending on the size and complexity of the space, sanding large floors can take 5 to 10 days or more to complete. Factors such as obstructions, complex floor designs, and the need for additional sanding stages can significantly affect the project’s overall duration. As a result, meticulous planning and coordination are essential to ensure efficient and timely completion of sanding large areas.

Professional Expertise and Efficiency

Importance of Hiring Professionals

Engaging experienced floor sanding professionals offers countless benefits critical to the success of any project. These experienced professionals bring a wealth of knowledge, skills, and expertise to the table, ensuring that the sanding process is carried out with precision and efficiency. With their extensive understanding of different wood types, finishes, and sanding techniques, professionals can seamlessly navigate the complexities of each project, delivering exceptional results that exceed expectations. Additionally, professionals are equipped with special tools and equipment specifically designed for floor sanding, increasing efficiency and effectiveness. By entrusting the work to professionals, clients can enjoy peace of mind knowing their floors are in capable hands, ready for optimal restoration and enhancement.

Skill and Technique

The skills and techniques employed by experienced professionals play an important role in the efficiency of the sanding process. Through years of experience and training, professionals have honed their craft, mastering the art of floor sanding with finesse and precision. Their expert knowledge allows them to assess the unique characteristics of each floor and tailor their approach accordingly, optimizing efficiency without compromising quality. From selecting the appropriate sanding grit to executing complex sanding patterns, professionals leverage their skills and techniques to streamline the process, achieving smooth, uniform results time after time.

Quality Assurance

Professional floor sanders are dedicated to maintaining the highest standards of quality and quality at every stage of the project. Adhering to meticulous quality assurance protocols, professionals carefully inspect the floor, identify any imperfections or inconsistencies, and promptly address them to ensure a flawless finish. Furthermore, professionals use premium-grade materials and finishes to increase the durability, longevity, and aesthetic appeal of the floor, improving the overall quality of the restoration or renovation project. By prioritizing quality assurance, professionals strive to exceed client expectations, deliver unparalleled results that stand the test of time, and minimize errors and setbacks along the way.

At Last

The duration of floor sanding is affected by several factors, including the surface area, type of wood, condition of the floor, and efficiency of the equipment used. While smaller rooms may only require a few days for completion, larger spaces can extend the timeline significantly. However, regardless of the size or complexity of the project, the importance of hiring skilled professionals cannot be overstated. Skilled professionals bring skill, efficiency, and precision to the table, ensuring the sanding process is executed flawlessly and on time. By entrusting their floor renovation needs to the professionals, readers can rest assured that their floors will receive the attention and care they deserve, resulting in stunning, long-lasting results. Therefore, for those considering floor renovation projects, professional services provide the expertise and peace of mind needed to achieve the desired results.

What is Timber Floor Sanding?

What is Timber Floor Sanding?

What is floor sanding and timber floor restoration in Melbourne Suburbs of Victoria.

Floor Sanding and Timber Floor Restoration in Melbourne

If you’re reading this, you’re probably wondering what floor sanding actually is, and whether timber floor restoration might be the right solution for your home or business. Timber floors are one of the most beautiful and durable flooring options available, but over time they naturally lose their shine. Scratches, dents, fading and general wear are all part of everyday life — especially in high-traffic areas. The good news? A professional floor sanding and restoration service can completely transform tired old floorboards into surfaces that look brand new again.

What is Floor Sanding?

Floor sanding is a process that involves carefully removing the top layer of your timber floor to reveal the fresh wood beneath. This not only eliminates scratches, stains, and dull patches but also prepares the surface for a new protective finish. It’s a detailed job that requires the right equipment, skill, and attention to detail — and when done properly, the results are stunning.

At Uniting Floors Melbourne, we regularly help homeowners across Melbourne restore the natural beauty of their timber floors. Whether it’s a charming period home in need of a refresh or a modern property that’s seen years of foot traffic, our sanding process can make your floor look as if it’s just been installed.

The Floor Sanding Process

While every job is unique, floor sanding generally involves three key stages — preparation, sanding, and finishing.

  1. Preparation:
    Before sanding begins, the entire area must be cleaned thoroughly. Nails are punched down, and any loose boards are secured. Furniture and dust-sensitive items are moved out to ensure a clean and safe workspace.
  2. Sanding:
    The sanding process is performed in stages, using different grades of sandpaper known as grits. The first pass removes any old finish, stains, and surface damage. Then progressively finer grits are used to smooth out the surface and remove sanding marks, leaving the timber silky smooth. It’s important to vacuum after each grit change to prevent stray particles from scratching the surface.
  3. Finishing:
    Once the floor is perfectly smooth, it’s ready for finishing. The finish acts as a protective barrier between the raw timber and the daily wear and tear of life — from shoes and furniture to pets and spills.

Choosing the Right Finish

Selecting the right finish depends on the look you’re after and how your space is used. Oil finishes are a popular choice for living rooms, bedrooms, and dining areas because they enhance the natural warmth of the timber and give a soft, organic appearance. Lacquer finishes, on the other hand, are more durable and ideal for high-traffic areas such as hallways, kitchens, or commercial spaces. Modern lacquers come in a variety of finishes — ultra-matt, satin, or gloss — so you can tailor the look to suit your interior style.

What is Timber Floor Restoration?

Timber floor restoration goes beyond sanding. It’s the process of bringing life back to an ageing or damaged floor through a combination of sanding, repairs, and refinishing. Over time, floorboards can warp, separate, or discolour — especially in older Melbourne homes where moisture and movement are common issues. Restoration addresses these problems, ensuring your floors are not only beautiful but also structurally sound.

At Uniting Floors, we specialise in complete timber floor restorations. Whether it’s repairing deep gouges, replacing damaged boards, or blending new timber with old, we take great care to maintain the character of your floors while improving their appearance and longevity.

Why Invest in Professional Floor Sanding and Restoration?

Professional floor sanding and restoration is one of the most cost-effective ways to add value to your property. Not only does it improve the look and feel of your home, but it also extends the life of your flooring. Properly maintained timber floors can last for decades and with the right finish, they’re easy to clean and maintain.

DIY sanding might seem tempting, but professional equipment and experience make a world of difference. At Uniting Floors, we use state-of-the-art dustless sanding machines, ensuring a clean, even result with minimal disruption to your home.

Give Your Floors a New Lease on Life

Whether your floors are showing signs of age or you simply want to refresh your living space, Uniting Floors Melbourne can help. From precise sanding to full timber floor restorations, our skilled team will transform your floors with care and craftsmanship.

Call Jay, the owner of Uniting Floors, today on 0478 001 336 to discuss your floor sanding or restoration project and get a free, no-obligation quote by filling out the form below. Your timber floors deserve the best — let’s bring them back to life.

References
• Australian Timber Flooring Association (2022). Timber Floor Finishing and Maintenance Guidelines. ATFA Publications. atfa.com.au
• Housing Industry Association (2023). Timber Flooring: Installation and Care Guide. HIA Australia. hia.com.au
• Department of Environment and Energy (2021). Sustainable Use of Australian Hardwoods in Residential Flooring. Australian Government. dcceew.gov.au
Is it worth sanding floors by yourself? Melbourne

Is it worth sanding floors by yourself? Melbourne

a man sanding his floors worthfully by yourself

Sanding is not just about fixing current damage; it is also about warding off future problems. Wooden floors can face a plethora of issues, but ensuring they are safe and functioning properly can save us from headaches later on. Remember, a smooth surface equals a clean one. If you’re only sanding a couple of rooms or touching up a small worn section, taking on the task of sanding floors yourself can be a practical choice. By doing it correctly, you could potentially save hundreds or even thousands of dollars compared to hiring a professional. When it comes to refinishing your hardwood floors, you have two primary options: tackling the task yourself or hiring a professional to handle it for you. Opting to sand the floors yourself could lead to significant savings, potentially ranging from hundreds to even thousands of dollars, as long as you execute the process correctly. You can achieve excellent results on your own.

Floor sanding is a wood floor refinishing process that removes the top layer of wood to reveal a new surface. This involves using special tools to sand away imperfections, scratches, and old finishes, ultimately restoring the floor’s natural beauty. This method is often used to revive worn floors, improve their appearance, and extend their lifespan. Well-maintained floors play an important role in the aesthetics and functionality of any space. They serve as the foundation of a room’s design, setting the tone for the entire environment. Beyond aesthetics, floor maintenance ensures safety by preventing accidents caused by uneven surfaces or protruding nails. Additionally, proper maintenance protects the investment in your property, as neglected floors can lead to costly repairs or replacements in the long run. Therefore, understanding the process of floor sanding and the importance of keeping floors in optimal condition is essential for homeowners and property managers alike.

Pros of Sanding Your Floors

Cost-saving benefits

Sanding your floors can significantly reduce the costs associated with hiring professional services. By taking on the job yourself, you can avoid labor costs and potentially save on equipment rental fees. Additionally, purchasing materials and supplies independently allows greater control over overall costs, enabling you to tailor the project to fit your budget more efficiently.

Sense of accomplishment and DIY satisfaction

Engaging in DIY floor sanding provides a deep sense of accomplishment and satisfaction. Completing such a project instills confidence in your abilities and develops a deep connection with your living space. Transforming worn-out floors into revitalized surfaces through your efforts can be immediately gratifying, contributing to a greater appreciation for your home and its upkeep.

Flexibility in scheduling

One of the advantages of sanding your floor is that it offers flexibility in scheduling. Unlike relying on professional services, which can be subject to availability and scheduling conflicts, DIY projects allow you to dictate the timeline at your convenience. This flexibility enables you to work at your own pace while accommodating other commitments and priorities without the constraints of external timelines.

Control over the process and materials used

Taking on floor sanding yourself gives you complete control over the entire process, from preparation to finishing touches. You have the freedom to choose the specific techniques, tools, and materials that best suit your preferences and needs. This level of control ensures that the project aligns with your vision for the outcome, allowing for customization and attention to detail that may not be possible when outsourcing the task.

Cons of Sanding Your Floors

Time-consuming and labor-intensive

Sanding floors is a delicate and time-consuming process that demands significant physical effort. It involves multiple stages including preparation, sanding, and finishing, each of which requires attention to detail. The extensive labor involved can be daunting, especially for those with limited time or physical ability, potentially prolonging project duration and delaying desired results.

Requires specialized equipment and skills

DIY floor sanding requires specialized equipment such as drum sanders, edgers, and buffers, which may require prior experience to operate effectively. Additionally, achieving professional-quality results requires a certain level of skill and technique, including understanding how to operate equipment and navigate different types of flooring surfaces properly. Without adequate expertise in these areas, there is a risk of producing subpar results or damaging the floors.

Potential for mistakes leading to damage

Inexperienced people with floor sanding can face challenges or make mistakes that can cause damage to the floor. Common mistakes include uneven sanding, over-sanding, or neglecting proper preparation, which can compromise the integrity of the wood and detract from the overall look of the floors. Repairing such damage can be expensive and time-consuming, with any initial cost savings from potential DIY efforts.

Health hazards associated with dust and fumes

Floor sanding produces substantial amounts of dust and fumes, which pose a health hazard to those involved in the process. Wood dust can irritate the respiratory system and aggravate existing conditions such as asthma or allergies. Additionally, some finishes and coatings used in floor refinishing emit volatile organic compounds (VOCs), which can cause respiratory irritation and other health problems. Appropriate safety precautions, including the use of personal protective equipment and adequate ventilation, are essential to mitigate these risks.

Factors to Consider Before Deciding

Type and condition of the flooring

Before starting a DIY floor-sanding project, it is crucial to evaluate the type and condition of the flooring material. Different types of wood have hardness levels and properties that can affect the sanding process. Additionally, floors with deep scratches, stains, or uneven surface conditions may require different sanding techniques or additional preparation steps. Evaluation of these factors helps determine project feasibility and complexity.

Personal skill level and experience with DIY projects

Evaluating your skill level and experience with DIY projects is essential to determining whether sanding the floor yourself is a viable option. This includes your familiarity with using power tools, understanding sanding techniques, and ability to follow safety protocols. Individuals with prior experience in similar work may feel more confident tackling a floor-sanding project, while those lacking the relevant skills may seek professional assistance to avoid potential mistakes or damage to floors.

Budget considerations

Budgetary considerations play an important role in deciding whether to choose DIY floor sanding or professional services. While DIY projects often offer cost-saving benefits in terms of labor costs, they depend on costs associated with renting or purchasing equipment, as well as the cost of materials such as sandpaper and finishing products. Comparing these costs with the estimated cost of hiring professionals can help you determine the most cost-effective option to achieve the desired results within your budget constraints.

Availability of professional services

The availability of professional floor sanding services in your area is another factor to consider when deciding to take on the project yourself. In some cases, limited availability or high demand for professional services may result in longer wait times or higher costs for outsourcing the work. Assessing the accessibility and reputation of local service providers can help inform your decision and provide insight into the efficiency and quality of results you can expect from professional support.

Alternatives to DIY Floor Sanding

Hiring professional floor sanding services

Choosing to hire professional floor sanding services offers several advantages over the DIY method Professional contractors have the skills, specialized equipment, and experience necessary to efficiently and effectively achieve high-quality results. By outsourcing the job to skilled professionals, homeowners can ensure that their floors are refinished to the highest standard with minimal disruption to their daily lives. Additionally, professional services often come with a warranty or guarantee, providing peace of mind and assurance of satisfactory results.

Exploring less invasive floor restoration methods

For homeowners looking for an alternative to traditional floor sanding, there are less invasive restoration methods available that can rejuvenate floors without the need for extensive sanding. Techniques such as buffing, screening, or chemical etching can be used to remove surface imperfections, scratches, and blemishes, restoring the appearance of floors with minimal disruption. These methods are particularly suitable for floors with little wear and tear or those made of sensitive materials that cannot withstand aggressive sanding.

Temporary solutions for improving floor appearance

In situations where a full-scale floor-refinishing project is not possible or necessary, homeowners can explore temporary solutions to improve the appearance of their floors. This may include using area rugs or floor coverings to hide imperfections, applying temporary floor finishes or polishes to enhance surface shine and protection, or using floor cleaning and maintenance products designed to refresh and revitalize worn floors. While these solutions may provide short-term improvements, they offer a cost-effective and non-invasive approach to maintaining floor aesthetics within more extensive renovation projects.

Tips for Successful DIY Floor Sanding

Proper preparation and planning

Before beginning the floor sanding process, thorough preparation and planning are essential to achieving successful results. This includes inspecting the floor for any damage or imperfections, repairing any problems, and ensuring the area is clear of furniture and obstructions. Proper planning involves creating a detailed timeline, gathering the necessary materials and equipment, and familiarizing yourself with the sanding techniques and methods to be employed.

Selection of appropriate sanding equipment and materials

Choosing the right sanding tools and materials is critical to achieving professional-quality results. This includes selecting the appropriate type and grit of sandpaper for specific types of wood and floor conditions, as well as ensuring the correct function of sanders, edgers, and buffers. Investing in high-quality abrasives and finishes can help reduce the risk of damage and ensure a smooth and uniform finish.

Techniques for minimizing dust and achieving even sanding

Minimizing dust during the sanding process is essential for maintaining a clean and healthy work environment. Utilizing dust containment systems such as vacuum attachments or dust bags on sanding equipment can help capture airborne particles and prevent them from settling on surfaces. Additionally, employing proper sanding techniques, such as maintaining consistent pressure and movement, and sanding with the grain of the wood, can help achieve even results and avoid over-sanding or uneven surfaces.

Finishing touches and maintenance tips

Once the sanding process is complete, it is important to pay attention to finishing touches and ongoing maintenance to preserve the newly refinished floor. This includes cleaning the area thoroughly to remove any dust or debris, applying a suitable finish or sealant to protect the wood and enhance its appearance, and allowing adequate drying time before resuming furniture or foot traffic. Implementing a regular maintenance routine, such as routine cleaning, periodically reapplying the finish, and promptly addressing any minor repairs, can help extend the life and beauty of the floors for years to come.

Case Studies or Personal Experiences

Success stories of DIY floor sanding projects

Sharing DIY floor sanding project success stories can provide valuable insight and inspiration for readers considering undertaking a similar endeavor. These stories can highlight the transformation of worn floors into beautiful, fresh surfaces that were achieved through careful planning, meticulous execution, and persistence. Before-and-after photos detailing the techniques and materials used can help illustrate the potential results and benefits of DIY floor sanding.

Challenges faced and lessons learned

Acknowledging the challenges and lessons learned from DIY floor sanding projects provides valuable knowledge and guidance for others embarking on similar ventures. From encountering unexpected obstacles such as hidden damage or stubborn finishes to navigating technical difficulties or learning from mistakes, sharing these experiences helps readers anticipate potential challenges and better prepare for them. Emphasizing the importance of patience, adaptability, and problem-solving skills can enable readers to approach their projects with confidence and resilience.

Comparison with professional results and costs

Comparing DIY floor sanding results and costs to those achieved through professional services offers readers a broader understanding of the trade-offs and considerations involved with each method. Highlighting the benefits and limitations of DIY efforts, such as cost savings and personalized control over the process, the skills and expertise provided by professional contractors, allow readers to make informed decisions based on their priorities and resources. Additionally, providing real-world examples and cost breakdowns can help readers evaluate the overall cost and feasibility of DIY versus professional floor sanding services.

At Last

The decision to do DIY floor sanding requires careful consideration of several factors, including the condition of the floor, individual skill level, budget constraints, and the availability of professional services. Throughout this exploration, we have highlighted the pros and cons of DIY floor sanding, along with alternative methods and essential tips for success. While DIY projects offer cost-saving benefits, a sense of accomplishment, and schedule flexibility, they also require time, effort, and attention to detail. Ultimately, the choice between DIY and professional floor sanding comes down to personal circumstances and preferences. DIY floor sanding can be a rewarding and cost-effective option for those with the necessary skills, resources, and time. However, individuals should also recognize the importance of proper preparation, safety precautions, and ongoing maintenance to ensure satisfactory results and long-term floor durability. Whether choosing DIY or professional services, informed decision-making and responsible practices are key to achieving successful results and preserving the beauty and integrity of your floors for years to come.

How to Stain Timber Flooring

How to Stain Timber Flooring

timber repair and restore in melbourne

 Staining adds color, protection, and personality to your timber floors. Unlike painting or sealing wood floors, stain soaks into the grain to accentuate the natural patterns and character of the wood. The staining process enhances the depth, varies the tone, and draws out the innate beauty of timber.

 When done correctly, staining timber floorboards can lead to dramatic, stylish results that uplift any interior space. From a rich espresso hue to a lightly whitewashed coastal vibe, the staining options for wood floors are endless.

 However, without proper preparation and application techniques, you may end up with splotchy, uneven color or a result that misses the mark for your goals. To achieve flawless stained floors that you’ll love for years, follow these essential tips.


Choose the Right Type of Stain

 Timber floor stains come in varied formulations, each with pros and cons. Consider these primary factors when selecting wood stain:


  • Oil-Based Stains: Offer deeper penetration for amplified wood grain pop and longer-lasting protection. Require mineral spirits for cleanup. Have an odorous fume during application that lingers for 24+ hours.
  • Water-Based Stains: Easier cleanup with just soap and water. Very low odor. Don’t accentuate grain as dramatically.
  • Gel Stains: Thicker consistency than liquid stains. Resist drips and lap marks so ideal for vertical surfaces too. Require paint thinner for cleanup.


Stain can’t work its magic on floors that haven’t been prepped. Ensure your wood is ready to absorb color evenly by:

 Sanding completely smooth, progressing up to 120-150 grit paper.

Vacuuming away all dust particles which could cause blotches if staining over them.

Wiping down thoroughly with a lint-free cloth or tack cloth.

Allowing it to fully dry as moisture prevents stain penetration.

Filling any cracks, holes, or imperfections with colored wood filler closest to your final stain tone.

Test First

 Always do a test patch with your selected stain color and technique on an inconspicuous section of the floor or a leftover wood piece. The test run will:

 Allow you to confirm that you like the color tone. The stain always dries darker.

Reveal how the stain reacts with your specific timber type. Replicate the finish too.

Judge the coverage and absorption rate to estimate how much stain you need to buy.

Apply Stain Correctly

 Careful prep is vital to prevent uneven staining, but meticulous application is equally critical for pro-quality results. Best practices include:


Stirring stain thoroughly as color pigments can settle then evenly coat brush/applicator.

Allowing for drying time between coats. Check label. Oil-based stain requires longer drying than water-based options.

Maintaining a wet edge by staining entire boards or large sections at once so overlap marks don’t develop.

Brushing with strokes following the wood grain.

Applying thin coats; too much stain leads to uneven absorption.

Wiping gently after a few minutes to avoid pooling and an uneven finish.

Complying with all temperatures, wear protective gear, ventilation, disposal, and safety precautions.


Protect the Finish

 Once your stained timber floor is complete, protect your efforts with:

 Floor wax to shield the surface from scuff marks and water rings while enhancing luster.

Area rugs in high-traffic spots to minimize scratching and wear to the finish.

Furniture floor pads under chairs and table legs as a preventative buffer.

Quick cleaning if spills happen to avoid deep-setting stains.

Caring properly for your stained wood will maintain the luminous, rich finish for years so your floors continuously feel fresh and new. With some strategic planning upfront and conscientious application, staining your timber is very achievable. Embrace the mesmerizing tones and striking grains your floors are waiting to unveil.


Steam Mops on Timber Floors: Should You Use Them?

 Timber floors impart timeless beauty and cozy warmth into any home. They elevate design as a focal point itself rather than just a utilitarian walking surface. That’s why protecting real wood floors from damage is a perpetual priority.


When considering steam mops for cleaning and maintaining your timber floors, exercise caution. While steam sanitizes floors without using harsh chemicals, excess moisture poses a high risk of warping wood and dulling stains. Weigh the pros and cons to determine if integrating steam mops suits your floors.

How Steam Mops Work

 First, understanding the steam mop mechanism of attack helps reveal their potential impact on delicate wood. Steam mops blast floors with jets of hot vapor rather than scrubbing with a liquid cleanser like a traditional mop. The forced steam helps lift and dissolve the grime.

 Typical steam mops reach temperatures around 250-290 F and then get forced out at high pressure. The heat kills germs and microscopic bacteria. The velocity propels away stuck-on dust and debris.

 Simultaneously, the condensation slightly dampens floors to dilute cleaning solutions if included in the mop pad. For set-in dirt, some steam mops permit dispensing spot cleaners from an onboard reservoir to assist steam action.

Evaluating the Benefits of Steam

 Undeniably, steam mops offer a noticeable upside:

 Thorough Sanitizing: Hot steam ventilation deactivates viruses, germs, and stuck-on bacteria growing in cracks and crevices that other cleaning methods never reach. This eliminates musty odor buildup too.

 Chemical-Free Formula: Since no detergent or cleaning liquids get used, steam mops cut down on toxin exposure in homes with babies and pets prone to contact allergies and ingesting residue. They provide germ removal the natural way.

 Easy Maneuverability: Weighing approximately 6 pounds on average, steam mops glide with little effort. Swiftly cover large areas without arduous scrubbing or repetitive motion. Power through rooms quicker than an old-fashioned bucket and string mops.

 Environmentally Friendly: Most steam mop manufacturers boast sustainability credos now. Reusable microfiber pads minimize waste versus constantly discarding chemical-soaked disposable pads. Steam action cuts back on toxic runs too. Hot vapor sanitizes cleanly.

 Budget-Friendly: Although the upfront investment runs $100-200 for a reliable steam mop, the long-term savings add up from not continually buying chemical supplies and disposable pads. Plus, many steam mop brands promise at least a 2-year lifespan.

Factor in Timber Floor Risks

 But on the flip side, significant precautions must be considered before subjecting delicate wood floors to hot steam cascades. Potential risks include:

 Moisture Damage: Excess moisture exposure relentlessly provokes stained timber floors. It seeps cracks compromising structural integrity long-term once inside the planks. Moisture nurtures mold growth underneath or makes nails pop slowly. Any warping damage proves irreversible.

 Finish Hazing: The intensity of steam may gradually degrade polyurethane or other protective finishes that shield stained floors from wearing prematurely. Steam loosens sealants that took painstaking applications to perfect.

 Stain Fading: While color change takes prolonged exposure, gradual fading or uneven blotchiness might develop if steam jets are on specific areas routinely. That ruins beautifully enriched stain patinas that wooden floors owe much allure.

 Transition Hazards: At edges where wood transitions to tile, gaps exist that provide convenient spots for condensation seeping underneath wood floors during steam mopping sessions. This migration causes detrimental swelling and bubbles in planks.

 Refinishing Difficulties: If steam mopping sessions slowly compromise floor finish resulting in mandatory resanding/resealing, that proves problematic for homeowners. Refinishing stained timber floors represents an intricate, costly endeavor — not a quick fix.

Recommendations for Steam Mopping Timber Floors

 The deciding factor on steam mop compatibility centers around moisture moderation. Used with extreme care and discipline, timber floors might withstand steam mops but expect consequences if overzealous. Weigh these recommendations when deliberating:

 Spot clean only using steam instead of entire floor steaming. Confine to sticky spots like kitchen spills or muddy entryways.

Invest in special wood/laminate steam mop pads claiming extra absorption. Or attach additional terrycloth towels to standard pads for soaking up excess moisture.

Keep the steam mop moving rapidly when operating to avoid prolonging concentrated steam jets in any single area too long. Never pause during head steam release.

Set appliance to lowest steam output option. Use intermittent steam mode to further decrease moisture infusion.

Allow floors to 100% air dry after mopping for 30 minutes minimum before walking on them to halt moisture penetration. Consider placing fans to accelerate.


Consensus

 Exercise conservative judgment before steam mopping timber floors routinely despite some alluring advantages the cleaning method seems to offer. The moisture risks counteract rewards when it comes to fragile wood. Manufacturers themselves advise careful discretion or avoiding it altogether.

 For deeper periodic cleaning beyond light surface dusting, rely on proven gentle hardwood floor cleaners and microfiber mops designed explicitly with wood finish protection prioritized. Or consider vacuum systems catered for timber allowing sanitation without direct contact or residue.

 When dealing with investment wood floors that enhance home value, play it safe. Weigh whether steam mopping warrants endangering their long-lasting luster and integrity for convenience’s sake. Often, it’s better to avoid it altogether.


Perfect Hardwood Flooring, Sanding & Refinishing in Melbourne

Perfect Hardwood Flooring, Sanding & Refinishing in Melbourne

perfect hardwood flooring sanding and refinishing in Melbourne near me

Hardwood flooring is one of the most sought-after choices for Australian homes. Its timeless beauty, warmth and durability make it the perfect foundation for any interior style, whether modern, classic, or coastal-inspired. Unlike many other flooring materials, hardwood floors don’t just look good when first installed – with the right care and maintenance, they can last for decades, growing more charming as the years go by.

At Uniting Floors, we believe that every hardwood floor deserves to shine. That’s why we specialise in hardwood floor sanding in Melbourne and offer expert hardwood floor refinishing services for homeowners searching for “hardwood floor refinishing near me”. Whether your floors are scratched, dull, or simply in need of a refresh, our skilled team can restore them to their former glory.

Why Choose Hardwood Flooring?

Hardwood flooring offers a combination of strength and natural beauty that is hard to beat. Each board tells a story through its grain and texture, and no two floors are exactly alike. Solid timber floors can be sanded and refinished multiple times over their lifespan, which makes them a smart long-term investment.

Beyond aesthetics, hardwood floors are also practical. They’re easy to clean, compatible with most interior styles, and add value to your property. Whether you’re renovating a heritage home or updating a contemporary space, hardwood flooring provides an elegant backdrop that enhances your interiors.

Hardwood Floor Sanding in Melbourne

Even the best hardwood floors experience wear and tear over time. Foot traffic, furniture movement, and day-to-day living can leave scratches, dents, and dull patches. This is where hardwood floor sanding becomes essential.

Sanding removes the worn-out surface layer of your floors, eliminating imperfections and exposing the fresh timber underneath. Once sanded, the floors are ready for refinishing, where stains and protective coatings are applied to achieve the desired look and strength.

At Uniting Floors, our team uses state-of-the-art sanding equipment to deliver a smooth and even finish with minimal dust. We tailor our sanding process to the type of timber and condition of your floors, ensuring outstanding results every time.

Hardwood Floor Refinishing Near Me

If your hardwood floors look tired, refinishing is the most cost-effective way to bring them back to life. When you search for hardwood floor refinishing near me, you’ll want a trusted company that combines craftsmanship, experience, and premium materials – and that’s exactly what Uniting Floors delivers.

Refinishing involves applying stains, oils, or sealants to the sanded timber to both protect and enhance the wood. Whether you prefer a natural matte finish, a warm satin sheen, or a striking dark stain, our specialists can help you achieve the look that complements your home.

The benefits of refinishing include:
• Restored beauty – Your floors will look like new again, with the grain and natural character of the timber highlighted.
• Extended lifespan – Protective finishes shield against moisture, spills, and wear.
• Design flexibility – Choose from a wide range of finishes and colours to match your décor.
• Increased value – Well-maintained hardwood floors can significantly boost the value of your property.

Cost Ballparks
The cost of hardwood flooring varies based on wood type, finish, and installation. Solid prefinished wood flooring can range from $2.40 to $13 per square foot, while engineered prefinished hardwood is a more budget-friendly option, ranging from about $1.69 to $9 per square foot. Don’t forget to factor in the costs of professional installation for an accurate estimate.

Hardwood Flooring Options

When considering hardwood flooring, there are plenty of species and finishes to choose from. At Uniting Floors, we supply and install a wide variety of solid timber options, including:

• Blackbutt – light and neutral tones, perfect for modern interiors.
• Tasmanian Oak – versatile and affordable, with warm and even colouring.
• Solid Oak Flooring – timeless, elegant, and a favourite among Melbourne homeowners.

Each option has its own unique character, making it possible to find the perfect hardwood flooring that reflects your personal style and lifestyle needs.

Why Choose Uniting Floors?

When it comes to hardwood floor sanding in Melbourne and refinishing, Uniting Floors stands out for quality and reliability. Our skilled professionals have more than a decade of experience in handling solid timber floors, from installation to restoration.

Here’s why homeowners trust us:
• Specialist knowledge – We understand the unique characteristics of different timbers and tailor our approach accordingly.
• Premium equipment and materials – Ensuring dust-free sanding and long-lasting finishes.
• Customer-focused service – From the first consultation to the final polish, we prioritise clear communication and satisfaction.
• Workmanship guarantee – We back our services with a 12-month warranty for your peace of mind.

Don’t let scratches and dull patches take away from the beauty of your home. Whether you’re looking for the perfect hardwood flooring, professional hardwood floor sanding in Melbourne, or expert hardwood floor refinishing near me, Uniting Floors is here to help.

Call 0478 001 336 today or visit our website to book a free consultation and quote. Let us restore your floors to their best and keep them looking stunning for years to come.

      References
      1. Australian Timber Flooring Association (ATFA). (2023). Caring for Your Timber Floors. Available at: atfa.com.au [Accessed 12 September 2025].
      2. Domain Australia. (2023). Flooring Trends and Renovation Tips. Available at: domain.com.au[Accessed 12 September 2025].
      3. Green Building Council of Australia (GBCA). (2023). Sustainable Timber Choices for Australian Homes. Available at: new.gbca.org.au[Accessed 12 September 2025].
      4. Photo by Curtis Adams on Pexels: pexels.com  [Accessed 28 August 2025]
      Staircase Sanding and Polishing Tips You Need

      Staircase Sanding and Polishing Tips You Need

      Floor Sanding Polishing Hurstbridge
      Welcome to UnitingFloors, your go-to source for stairway sanding and polishing.

      A staircase is much more than a way to move between levels – it’s often one of the first things people notice when they walk into your home. Whether you’ve got a classic timber staircase or a sleek modern design, stairs can be a real focal point that adds style and character. But with daily use, foot traffic, spills and the occasional knock, staircases can start to look worn and tired over time. That’s where sanding and polishing come in.

      At Uniting Floors, we understand how important it is to keep your stairs in top condition. A well-maintained staircase not only enhances your home’s appearance but also ensures safety and comfort for your family. Professional sanding and polishing bring timber back to life by restoring its natural grain, improving durability, and leaving a flawless finish. Here’s everything you need to know about keeping your staircase looking beautiful for years to come.


      Why Staircase Sanding and Polishing Matters

      Caring for your staircase isn’t just about keeping it looking good – it’s also about safety and longevity. Timber stairs naturally collect scratches, dents, stains, and wear from constant use. Left untreated, this damage can make your stairs appear dull and neglected, or worse, create uneven patches that become a tripping hazard.

      Sanding removes old coatings, rough patches, and deep scratches, creating a smooth and even surface. Polishing then enhances the natural character of the timber, protects against future wear, and restores a fresh shine. When carried out every few years, this process can extend the life of your staircase while keeping it safe and stylish.


      Step-by-Step Guide to Sanding and Polishing Stairs

      Here’s a simple breakdown of the process professionals follow to rejuvenate timber staircases:

      Step 1: Prepare the area
      Clear away furniture and cover nearby surfaces to protect them from dust. Creating a safe, tidy workspace makes the process smoother.

      Step 2: Clean the staircase
      Sweep and vacuum to remove dirt and debris. A clean surface helps the sanding equipment achieve a better finish.

      Step 3: Sand the timber
      Start with coarse-grit sandpaper to remove old finishes, scratches, and stains. Always sand with the grain of the wood to prevent damage. Progressively switch to finer grits for a smooth, even result, paying attention to edges and corners.

      Step 4: Tidy up
      Vacuum thoroughly and wipe down the steps with a damp cloth to remove any remaining dust.

      Step 5: Repair imperfections
      Fill cracks, gaps, or holes with a high-quality timber filler. Once cured, lightly sand the repaired spots to blend them in seamlessly.

      Step 6: Apply stain or polish
      Depending on your style, you may choose to deepen the colour with a stain or highlight the natural grain with a clear polish. Apply thin, even coats, allowing each one to dry before adding the next.

      Step 7: Final touches
      Inspect the staircase in natural light. Add an extra coat if needed for a richer finish and better protection.


      Refinishing and Resurfacing Hardwood Stairs

      While sanding and polishing are essential maintenance steps, sometimes your staircase may need a little extra care.

      • Refinishing involves sanding the surface back to raw timber before applying fresh stain or polish. This is ideal for restoring the original look or updating the colour to suit a new interior style.
      • Resurfacing goes further, addressing heavily worn or uneven stairs. It may involve deeper sanding, structural repairs, and fresh coatings to give your staircase a complete refresh while maintaining its natural charm.

      Both processes not only revive the appearance of your stairs but also strengthen their durability, ensuring they remain practical and beautiful for years to come.

      Restore Your Stairs with Uniting Floors

      At Uniting Floors, we believe your staircase deserves just as much attention as the rest of your home. With years of expertise in staircase sanding, polishing, refinishing, and resurfacing, we provide tailored solutions that deliver stunning results.

      Whether you’re after a light polish to refresh tired timber, a full refinishing treatment, or a complete resurfacing to repair years of wear, our team uses high-quality products and dust-free technology for a flawless finish with minimal disruption.

      Don’t let dull, scratched, or uneven stairs take away from your home’s appeal. Contact Uniting Floors today on 0478 001 336 for a free quote and take the first step towards safe, stylish, and long-lasting timber stairs you’ll love.

      Frequently Asked Questions (FAQs)

      What areas does Uniting Floors service?
      We proudly service clients right across Melbourne and surrounding suburbs.

      How long does staircase sanding and polishing take?
      Every staircase is different, but most jobs are completed within two to three days.

      Is it safe for kids and pets during the process?
      Yes. Once our products have fully dried, they are non-toxic and completely safe for both children and pets.

      Can I choose a custom stain colour for my staircase?
      Absolutely! We offer a wide range of stain colours so you can match your staircase to your style and décor.

      How much does it cost to sand and polish a staircase?
      Costs vary depending on the size and condition of your staircase. We’re happy to provide you with a free, no-obligation quote so you know exactly what to expect.